About My Project
In Architectural Design class, I was informed that the fisrt project of the year was called the Dining Room Design Project. The purpose of this project was to create a dining room that looks appealing to the eye. Requirements for this project include four walls, a floor, a ceiling, a window or windows, a table, and a light source. An influential website that gives people some insight is additionally needed for this project. If all of this criteria is met, students in the architectural design class will receive a good grade. This project should approximately take twelve to fourteen classes to complete.
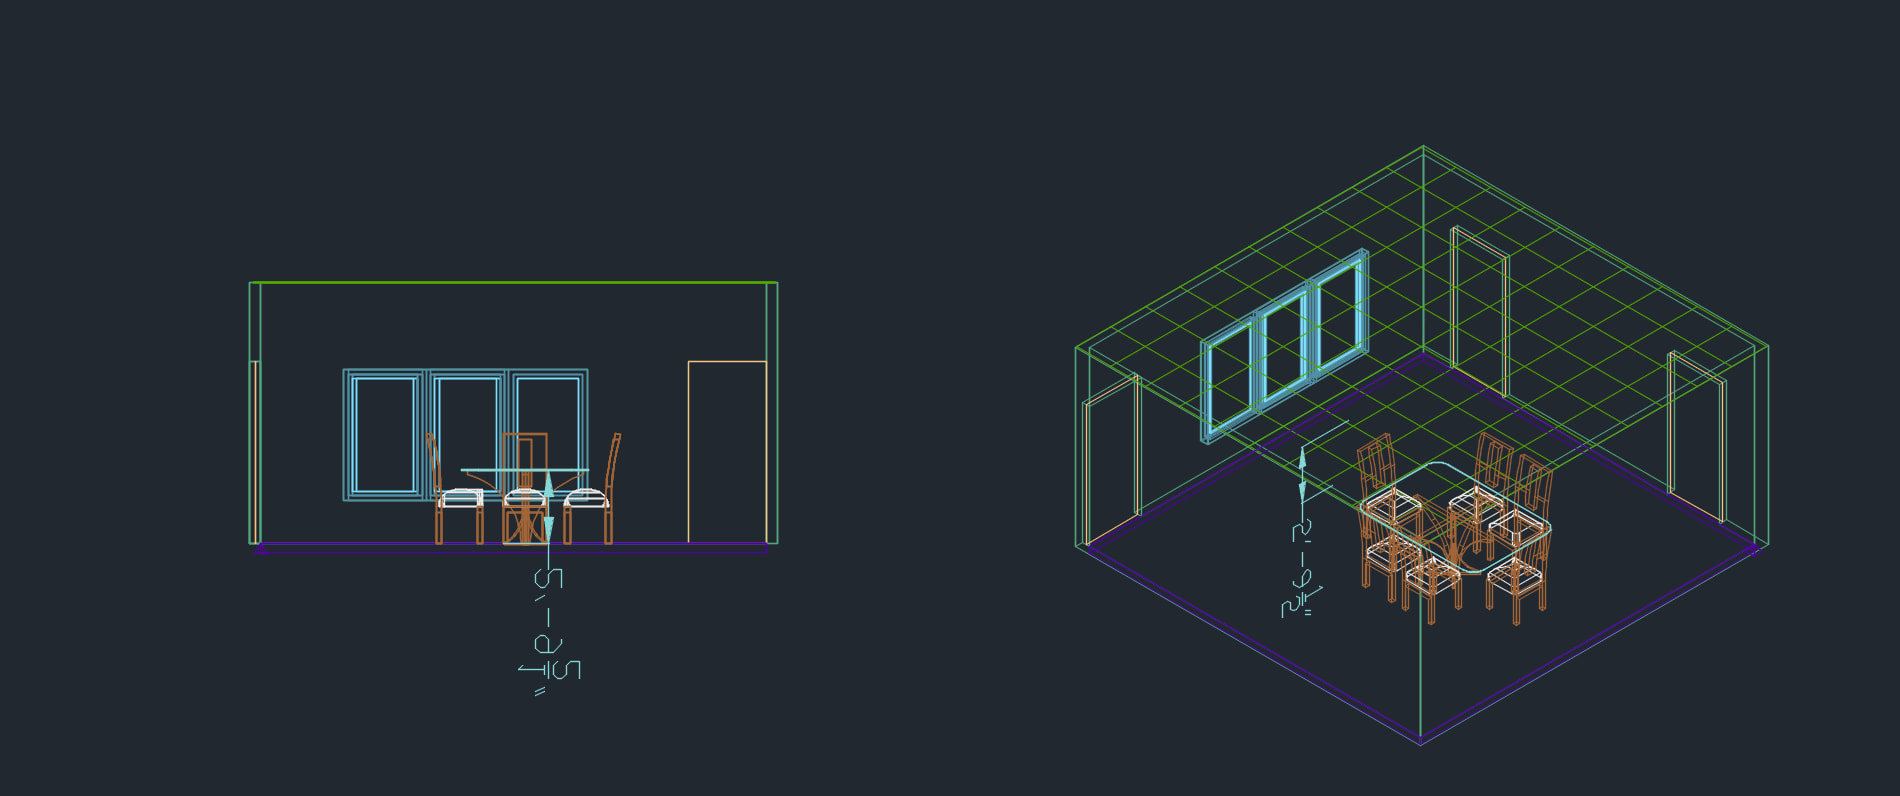
The first project of the year the teacher informed that I must make was called the Dining Room Design Project. These two images above show what my work looks like after about ten to twelve classes. I first started off my assignment by inserting four walls into my design to form a barrier as to where I will design my dining room. To put up the four walls was not that difficult at all. After the walls were put up, I moved on to putting in the windows and doors. I was able to put three doors throughout the dining room to give people the interpretation that there are multiple ways to get in and out of the room. The windows were not that difficult to put in the walls. Three windows, side by side, is what I decided to put in my dining room. After the windows and doors were secured in my room the floor is what I focused on next. I was able to put the floor in as a slab. Although, as a viewer you can not see the floor in the pictures above, once the light source is added in, the floor will easily be seen. The ceiling was another item I had to add to my dining room assignment. I was able to insert a grid on the top of the four walls. The grid allows me to drag it, and make it as big as I want it to be. It was not that difficult to insert the ceiling grid into the design. Once the ceiling was in, I was then able to move on to the dining room table. I struggled a lot when I was trying to put the table in. It took me several classes to finally find a dining room table that was, both 3D, and AutoCAD. I had to search several websites to find a table that would actually work in my design. Once I got the table, and added it into my design, I had some troubles trying to find the right position that the table would look good at. It took me several different tries to put the table in the correct spot. Once I got the table in, the only item left to add into my design is a light source. This image shows you what my design looks like after the dining room table was added in. On the left, it shows a side view, as to what my design looks like. The image on the right shows an angled view of my design at this point in the design.
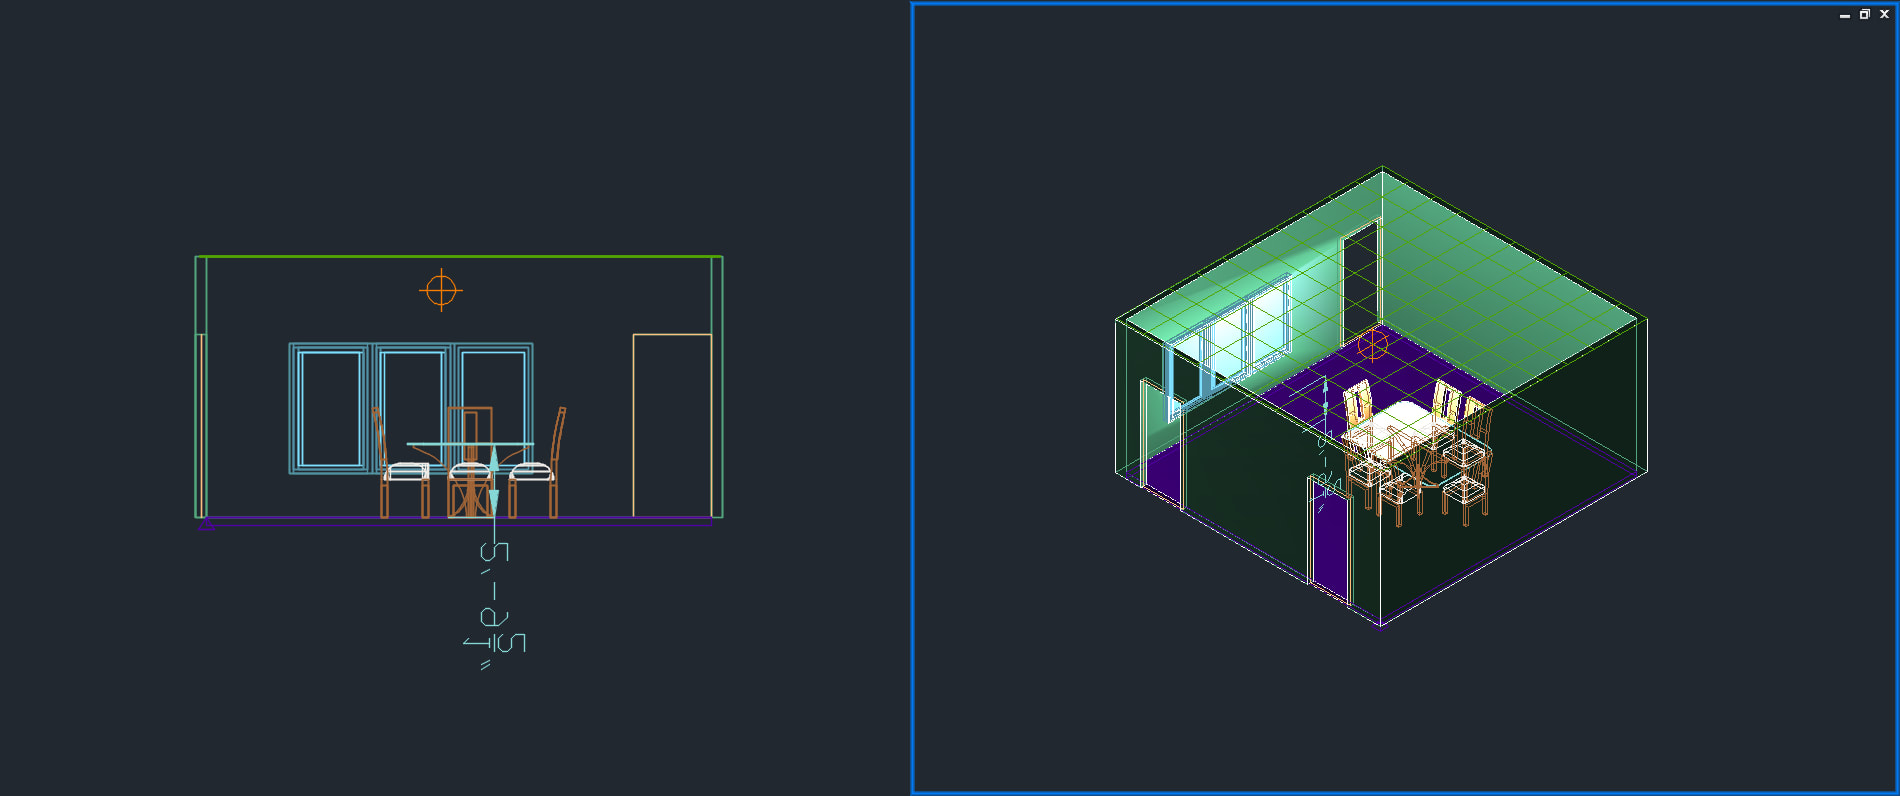
These two pictures shown above display what my work looks like after the light sources were added. It was pretty difficult to get a light source into my dining room design. To insert the light was hard to begin with. Once the light was in the design you had to make sure the brightness and intensity was good enough to be able to light up the room. Certain lights can work depending on where they are in reference to the dining room. I inserted two spot lights on the outside of the house. The goal of the spot lights are to light up the outside walls of the house. After I figured out that the spot lights were working, I moved to lighting up the inside of the house. In the house I added a point light. The point light was placed above the dining room table. It is there to light up the inside of the house so viewers can see what the inside design of the house looks like. The picture on the left shows a sideways view of my dining room. It gives the viewer an idea of what the dining room design would look like at full size. The picture on the right shows what the dining room design looks like from an angled view. It shows the appearance of the room with the light sources added. The picture displays what the room looks like with the four walls being green. Although the walls appear green on the picture, if you were to render the design, the walls would appear the colors I chose them to be on the materials browser. The floor in the picture appears purple. If the picture is rendered, the floor appears differently. The floor would appear as a hardwood floor. I chose to make the floor a hardwood by choosing that type of floor in the materials browser. These two pictures include all of the criteria needed for the project. After all of the criteria was met for my dining room design, I can now continue my designing. I will now expand my work by adding on different rooms to expand the bottom floor of my design. My plan is to make my design so that viewers would actually want to live in this house. I plan to first expand upon the kitchen. My goal is to make the kitchen lead to the dining room. With the kitchen leading to the dining room, it will allow for easy access to bring the food in the kitchen to food in the dining room. There will be an opening so that the houseguests are able to walk straight from the kitchen to the dining room.
